Pages

Saturday, April 28, 2012

Weight Watchers Crusted Honey Mustard Chicken


Luke and I aren't in the habit of counting calories but I have to say that we have really enjoyed all of the Weight Watchers recipes we've tried. This recipe is from the Weight Watchers website and it's a great spin on fried chicken fingers. The crispy coating is made from crushed cornflakes and they are baked which cuts down the fat. They are also very simple- from start to finish they were done in under half an hour. I think next time I may try a ranch variation by substituting ranch dressing for the honey mustard just to try something new! 


Weight Watchers Crusted Honey Mustard Chicken

Ingredients:
  • 2/3 cups lite honey mustard dressing   
  • 1 pounds uncooked boneless skinless chicken tenders
  • 1 cup cornflake crumbs  
  • 1 medium uncooked scallions, finely sliced  
  • 2 tsp dill, freshly chopped
  • 1/8 tsp table salt   
  • 1/8 tsp black pepper  


Directions: 
Preheat oven to 425°F. Coat a shallow pan with cooking spray.
In a small bowl, combine honey mustard dressing, salt, pepper, dill and scallions.
Place cornflake crumbs in a shallow bowl. Dip chicken into dressing mixture and then cornflake crumbs; place in prepared pan.
Bake until chicken is golden and no longer pink in center, about 15 minutes.

Adapted from: http://www.weightwatchers.com/food/rcp/RecipePage.aspx?recipeid=57621

Wednesday, April 25, 2012

Garlicky Baked Shrimp


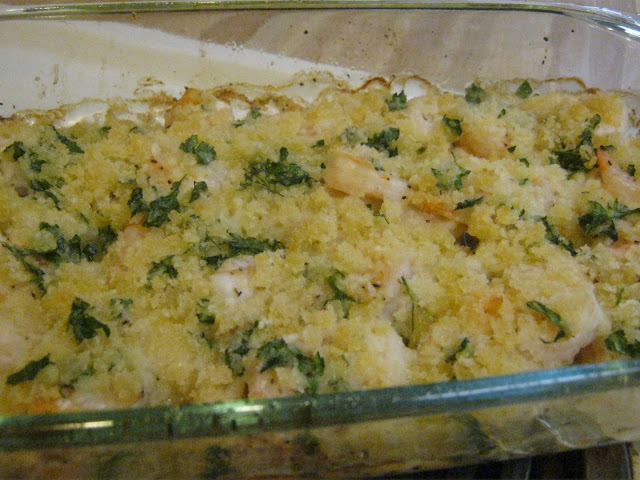
Since shrimp is one of the few sea foods that Luke actually likes, I stay on the look out for any recipes that have shrimp as the main ingredient. I found this lovely one on Pinterest. I know I didn't get a great pic, but this is a fast, delicious dish! Serve it over some rice to make the shrimp go a little farther. If you really like garlic, you may want to increase the amount a little. Over and out!


Garlicky Baked Shrimp


Ingredients:
  • 1 lb. raw shrimp, deveined and peeled
  • 4 cloves garlic, minced
  • 2 Tbsp. white wine
  • salt and pepper
  • 1/4 cup (4 Tbsp.) melted butter
  • 1/2 cup Panko bread crumbs
  • 2 Tbsp. fresh Italian-leaf parsley, chopped
  • half of a lemon


Directions:
Preheat oven to 425 degrees F.
In a bowl, combine the shrimp, garlic, and white wine.  Stir to combine, then pour into a baking dish.  Spread out evenly, and then season with salt and pepper.
In another bowl, use a fork to mix melted butter, Panko, and parsley until well combined.  With your fingers, sprinkle the mixture evenly in the baking dish over the shrimp.
Transfer dish to oven and bake until the shrimp are pink and opaque, about 15-18 minutes.


Adapted from: http://gimmesomeoven.com/garlicky-baked-shrimp/

Tuesday, April 17, 2012

Homemade Yum Yum Sauce (Shrimp Sauce)


I can't believe I finally have the recipe for this delicious sauce! I have to admit, this sauce is one of my favorite things about going to Hibachi restaurants.   It is so yummy on everything; shrimp, chicken, rice, veggies. We really liked it with this Crock-pot Honey Sesame Chicken recipe. It just adds some pizzazz to the meal! I have heard that there are many different versions of this sauce, so hopefully this is similar to the one you like. This one came pretty close to the kinds I've had. Also, I think next time I will try ketchup instead of tomato paste because I just hate opening up a whole can of it just to use a measly tablespoon. Plus, I don't always have tomato paste on hand. I'll probably just decease the water a little so the consistency stays about the same. 


Homemade Yum Yum Sauce (Shrimp Sauce)

Ingredients: 
  • 1 Cup Low-Fat Mayonnaise
  • 1/4 Cup Water
  • 1 tbsp. Tomato Paste
  • 1 tbsp. Melted Butter
  • 1/2 tsp. Garlic Powder
  • 1 tsp. Sugar
  • 1/4 tsp. Paprika
  • 1/4 tsp Cayenne Pepper 
  • 1-2 tsp Soy Sauce
Directions: 
Whisk all ingredients together until the sauce is creamy. Do not add all the water at once. Add a little at a time until you get the consistency you want. Refrigerate over night. 


Adapted from: http://brandyscrafts.blogspot.com/2012/01/homemade-yum-yum-sauce.html


Since this was a short post, I have to throw in a cute picture of Luke and the pup "studying." What a couple of goobers ;-)


Sunday, April 15, 2012

Crock-Pot Honey Sesame Chicken


With finals approaching fast, it seems like every class is trying to fit in a test before they start. So that means busy days spent studying and not much time for cooking. As usual, I turn to my trusty crock-pot to help me out. I found this recipe which is a copycat of the bourbon chicken served at the mall food court. I'd say it's even better and it is super easy to make. I will be making this recipe again and again. Luke's buds were over again and they give this recipe a big thumbs up! I served it with homemade Yum Yum Sauce, also know as shrimp sauce, like the kind from Hibachi Japanese restaurants. That stuff is so good on everything and I am so glad to have my own homemade version. I'll share that recipe with you all soon! 

Crockpot Honey Sesame Chicken

Ingredients:
  • 1 lb. boneless, skinless chicken thighs, about 5
  • Salt and pepper
  • 1 cup of honey
  • 1/2 cup of low sodium soy sauce
  • 1/4 cup ketchup
  • 2 tbsp. vegetable oil
  • 2 cloves of garlic, minced
  • 1/2 cup diced onion
  • 1/4 tsp. red pepper flakes
  • 2 tbsp. cornstarch
  • 2 tbsp. cold water
  • Sesame seeds


Directions:
Place the chicken thighs in the crockpot insert and sprinkle salt and pepper on both sides.

In a medium sized bowl, combine honey, soy sauce, ketchup, oil, garlic, onion, and red pepper flakes. Stir to combine well. Pour over the chicken in the crock-pot.

Cook on low for 3-4 hours or high for 1 1/2-2 1/2 hours.

When done, remove chicken from crock pot and cut into chunks. Prior to putting the chicken back in the crock pot, combine the cornstarch in the cold water and whisk it into the crockpot to thicken up the sauce a bit. Throw the chicken back in and stir around to recoat the chicken in the sauce.

Serve hot over a bed of white rice (optional) and sprinkle some sesame seeds on top.

Adapted from: http://www.tablefortwoblog.com/2012/02/21/crockpot-honey-bourbon-chicken/

Wednesday, April 11, 2012

Brownie Baked Alaska


This past week we celebrated my hubby's Birthday! Instead of a Birthday cake, Luke always requests Baked Alaska. Before meeting Luke, I had heard of Baked Alaska but I never really knew what it was. Boy, was I missing out!! This version (his favorite) has a brownie base, ice cream center, and a toasted meringue top. The key to this concoction is to seal the ice cream layer with the meringue so that when you bake it, the meringue gets toasted like a marshmallow and  the ice cream stays nice and cold. It is really not a difficult thing to make, just plan ahead so that the layers each have time to set properly. I don't think we'll wait a whole year to make this again! 

Here are a couple of pics we took after our bellies were filled with Baked Alaska!


Brownie Baked Alaska


Ingredients: 
  • Brownie mix plus any ingredients needed to prepare batter
  • 1/2 gallon of vanilla ice cream (preferably block, not bucket)
  • 6 egg whites
  • 1/4 tsp. salt
  • 1/4 tsp. cream of tartar
  • 1 cup sugar
Directions: 
Bake brownie mix in pan as directed on package. Bake slightly less than usual. Cool. 

Cut ½ gallon of ice cream into 1"-thick layers and cover the brownie and refreeze.

To make the meringue, turn electric mixer on high speed, beat 6 egg whites (at room temp). Add ¼ tsp salt, ¼ tsp cream of tartar, and 1 cup sugar, gradually. Beat until stiff peaks form. To test if meringue is done, rub a little between fingers. If it feels grainy, continue beating. Spread meringue over ice cream and brownie, sealing to edges, leaving none of the ice cream exposed (*this is very important!!) and freeze 


To serve: Preheat oven to 500 degrees F. Bake 4-5 min until lightly browned. Serve immediately. 


Sunday, April 8, 2012

Cheese and Onion Petite Quiche


Happy Easter everyone! I've got a tasty recipe that is perfect for Easter brunch or specialty appetizer. It is rich, delicious bite size quiche that is sure to be a crowd pleaser! Luke and I love those frozen petite quiche from the grocery store and we think I came pretty close to replicating them. The original recipe called for Gruyere cheese, but I'm a poor college student and can't afford $15 (FIFTEEN DOLLAR!!!) cheese, so I substituted it for Vermont cheddar. I thought the results were great, but if you can afford it, you might want to try the Gruyere. This recipe's filling is also very versatile. Adding broccoli, spinach, or bacon would be very easy and give them a bit more color and variety. Enjoy!


I hope you all had a wonderful Easter with friends and family, remembering the awesome work that Jesus did on the cross for us nearly 2000 years ago. This was my favorite verse from a song we sung at church this morning, which sums it up nicely :-)


"And as He stands in victory
Sin's curse has lost its grip on me
For I am His and He is mine
Bought with the precious blood of Christ" (from the song In Christ Alone)


Cheese and Onion Petite Quiche 
  • 2 9″ ready made pie crust
  • 2 Tbsp Butter
  • 2 Medium Onions, halved and finely sliced
  • 2 Eggs
  • 1 1/4 cups Heavy Cream
  • 2/3 cup Vermont Cheddar Cheese, coarsely grated, divided in half
Preheat oven to 400 degrees F.
Roll out pie crust and cut into 2 1/2" round circles. Press into greased mini muffin tin.
Beat the eggs in a bowl, then gradually add the cream. Stir in the onions and half the cheese, then season with salt and pepper. Carefully fill each muffin cup with about a tablespoon of batter. Sprinkle with the rest of the cheese, then bake for 20-25 mins until set and golden.


Friday, April 6, 2012

Bacon and Cheese Breakfast Muffins with a Kick


I really love breakfast foods but I am not a fan of getting up early. That's why I tend to only make them on the weekends, then it doesn't matter if we have a late breakfast! This weekend I made these savory muffins with some left over bacon that needed to be used up. They were perfect for a quick morning breakfast, and I had all of the ingredients on hand (yay!). I did think that the recipe was a little heavy handed with the black pepper, I might half it next time. They are not very spicy, but have a little kick. I think these would also be good as a dinner side, served with some garlic herb butter.


Bacon and Cheese Breakfast Muffins with a Kick


Ingredients:
  • 1 egg
  • 1 cup milk
  • 1/4 cup vegetable oil
  • 1 cup shredded cheddar cheese (we used sharp)
  • 8 bacon strips, cooked and crumbled 
  • 2 cups all purpose flour
  • 2 tablespoons sugar
  • 3 teaspoons baking powder
  • 1/4 teaspoon Kosher salt
  • 1/8 teaspoon garlic powder
  • 1/2 teaspoon cracked black pepper
  • 1 teaspoon Cajun seasoning

Directions:
Preheat oven to 400 degrees F.
In a large bowl, beat the egg, milk and oil together.  Stir in the bacon crumbles and shredded cheddar cheese.
Add the dry ingredients, stirring as you go, incorporating just until blended.
Fill greased muffin cups 2/3 full. Bake for 15-20 minutes until cooked all the way through. Cool for 5 minutes and remove from the muffin pan, placing on a wire rack to cool. Best served when warm.


Adapted from: http://dineanddish.net/2012/02/bacon-and-cheese-breakfast-muffins-with-a-kick/

Wednesday, April 4, 2012

Symphony Bar Brownies


I almost hate to call this a recipe, but I also hate to keep this "recipe" to myself. These brownies are so simple, but oh so delicious! Basically, in the middle of the brownies is a Hershey's Symphony Bar, an almond toffee milk chocolate candy bar. My favorite time to eat them is after they have cooled and the chocolate in the center has hardened, so you have a moist brownie wrapped around a crunchy chocolate center... am I making your mouth water yet?? Good. You could also sub out the Symphony bar for any other flat candy bar. You can also use a homemade brownie batter recipe if you'd like, I just use the box for simplicity!


Annnnnd here's a picture of Abby playing 'cause she's a cutie. 


Symphony Bar Brownies


Ingredients:
  • Brownie mix + any ingredients needed to make batter
  • 3 Symphony bars
Directions: 

Prepare brownie mix as directed on box. Pour half of the prepared batter into a 9X13 baking dish. Lay Symphony bars flat on top so that most of the brownie batter is covered by chocolate bar. Pour the remaining brownie batter on top of the chocolate bars. Bake as directed on brownie mix box.